How to Install an Intel Processor?

The processor which is also called as Central Processing Unit or “CPU”, is defined as the central nervous system for the computer. All the computer components usually get older and obsolete as the technology evolves. The same way the processors also quickly become outdated and obsolete, since there are powerful new versions available in the market on a regular basis. Though upgrading the processor is one of the more expensive upgrades that one can perform, it can yield massive performance increases.
Before purchasing an upgrade, people should be able to understand the compatibility of the system. The beating heart of any PC is the CPU. For any intensive work is done to be done with ease, the CPU plays a vital role in it. Nowadays, upgrading to bleeding-edge processors has become less important since the light of ever-faster graphics cards and the extremely high usage of the SSDs mixed with slowing CPU performance gains attention from generation-to-generation. But whatever comes in, the CPU remains one of the most vital and irreplaceable parts of the PC. This article explains how to install the intel processor.
How to choose a new Processor:
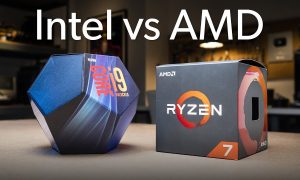
Though there are various processors available across the market, Intel Processor always remains favorite in people’s minds. Choosing the right CPU for the PC can be a complex process, but if people start with a solid idea of what their budget is and what their goals are then they can make a decision pretty quickly. The goals defined would be their usage, whether for office purposes, or gaming usage, etc. Choosing any new processor comes by practice. It depends on various factors like speed, price, socket type, etc. For example, the processor Intel’s Core i7-5820K costs around $390 which is based out of six-core “Haswell-E” chip and it has Intel’s Xeon server chips and the socket used is the high-end LGA 2011-v3 socket.
The above inter-processor would be recommended for people who are in need of additional computing power and are not much worried about the price and specifications. Another example is that Intel’s Core i7-4790K which costs around $340. This chip has only four cores but it also has an extra 500MHz of clock speed which is over the i7-5820K and it generally outperforms the other expensive processors in the market which are designed for games and apps. The Core i5-4690K Intel processor is the best compromise between price and performance on the market, and it is very much affordable for the chip gamers.
In general, the most powerful chips are Intel’s Core i7processors, and these are best for multimedia editing. The previous version of the processor, Core i5 chips don’t have hyperthreading and are thus less powerful than Core i7 chips, but at the same time, this processor should be plenty useful for gamers and most other users. The other processor Core i3 chips are the weakest Core chips, but it is highly useful for the people who don’t push so much hard for the system.
Here are some step about how to install an Intel Processor
We have quite seen a lot of considerations to make before choosing or upgrading the processors. With all these purchasing considerations, the installation of the CPU is also a crucial and vital part. Below are the few steps to be followed while installing the Intel processors.
- One must start with the motherboard initially. There is a small metal lever holding on the motherboard, release it by holding the CPU retention bracket to Intel’s LGA socket in the motherboard.
- The chip can be inserted then. The two guiding notches on the socket have to be lined up along with the notches at the edge of the chip. These notches are designed in such a way that it helps to prevent from seating the CPU in the socket in an inappropriate manner.
- Lower the retention bracket back into place once the chip is seated in the socket.
- One must note to slip the notch at the end of the bracket which is around the single screw seated at the base of the socket. Then the CPU can be locked into place using the metal lever.
- After the processor is installed, one must install the CPU cooler. There are two types of cooler available which are stock Intel cooler and aftermarket cooler.
- The difference between both the coolers is that the former will have thermal grease under the heat sink by default whereas in the latter, once must need to apply rice grain size dot of thermal grease.
- The other difference is that the Stock Intel’s cooler uses push pins to attach itself to the motherboard which is one of the nicest things of all. The cooler has to be placed on the CPU and the push pins have to be pressed in order to attach itself to the motherboard.
- Once the pins are pushed for attaching it to the motherboard, the black locking tab has to be pushed through the other side, into the mounting pin and it should be twisted towards the center of the CPU.
- The last and the final step are to connect the fan header wire, leading from CPU to the fan header on the motherboard.
If a new motherboard or the processor has been installed which is completely different from the old processor, then the operating system has to be reinstalled. This step would bring back the system, if the booting takes up a lot of time or if people find any issues in booting steps. This step would help to keep the system alive and bring back to the running stage again. Earlier, the installation of a new processor or upgrading new one had been a very vital part of setting up the system and we needed any computer expert to bring things back in place if something goes wrong. But as technology is seizing the world, it is easier for people to upgrade the processor easily.